How to Draw Robin Step by Step Easy
There are millions of bird enthusiasts around the world. Some people dedicate a lot of their free time to observing and studying them and some just like admiring the birds in their gardens.
For people with even a passing fancy for birds, it's likely they will have a favorite. The robin is a bird that many people love due to its delicately beautiful features and sweet singing.
Learning how to draw a robin is a great way to show your love of these adorable birds.
If you love robins and want to show your love by creating some amazing artwork featuring them, then this will be the tutorial for you!
Our step by step guide on how to draw a robin in just 7 steps will show you how you can recreate this cute bird!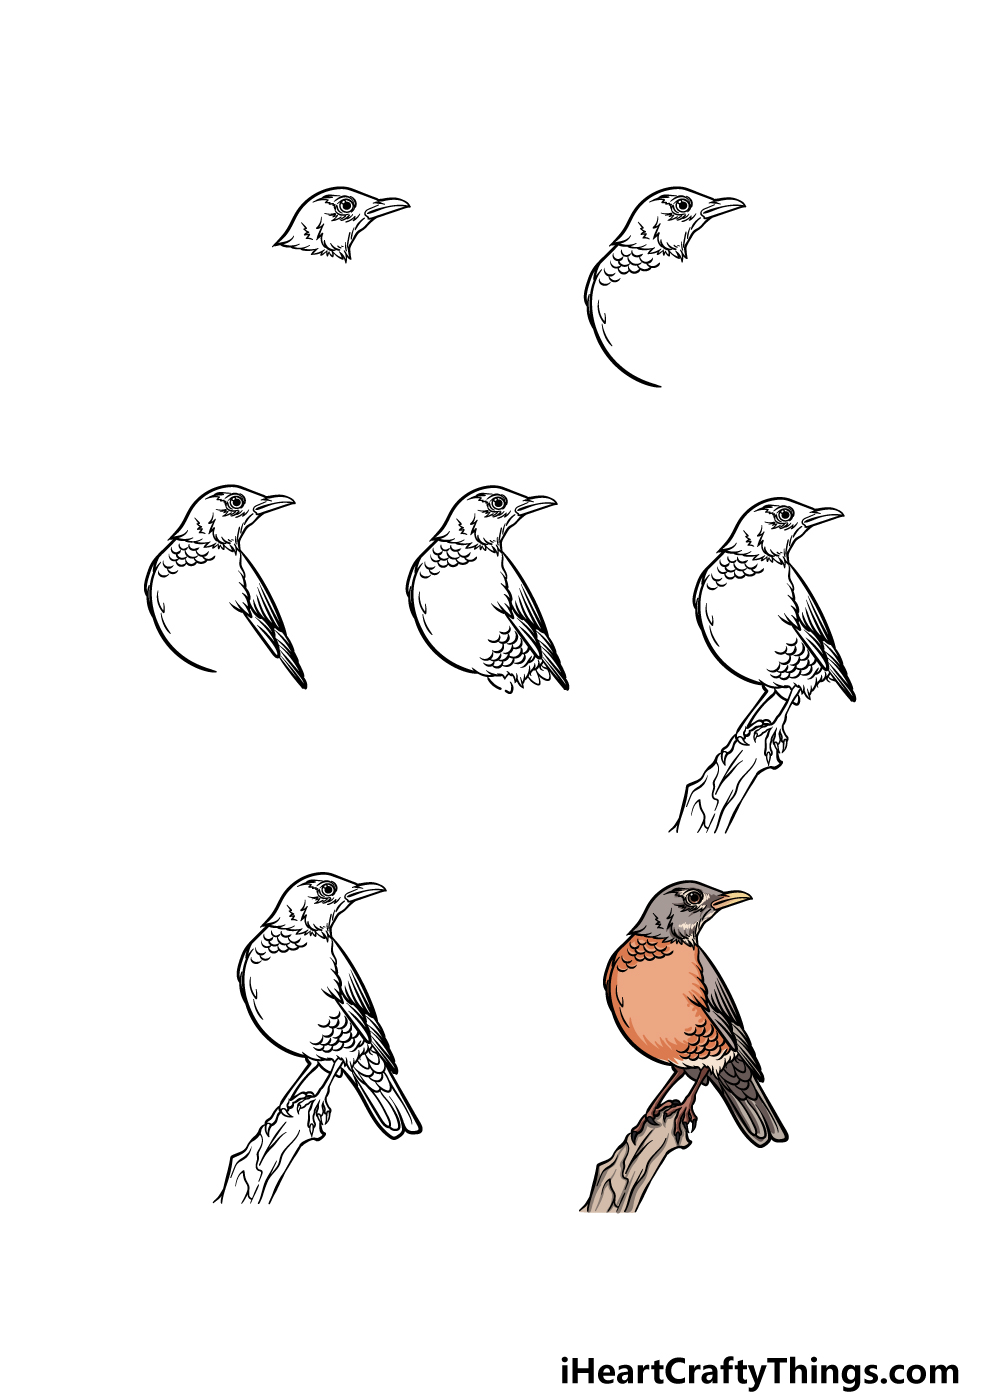
What's in this Blog Post
- How to Draw A Robin – Let's Get Started!
- Step 1
- Step 2 – Now, start drawing the chest of the robin
- Step 3 – Draw the first wing of the robin
- Step 4 – Next, draw some feather details for the base of the body
- Step 5 – Now, add the legs and the branch it is perched on
- Step 6 – Add the final details to your robin drawing
- Step 7 – Finish off your robin drawing with color
- Your Robin Drawing is Complete!
How to Draw A Robin – Let's Get Started!
Step 1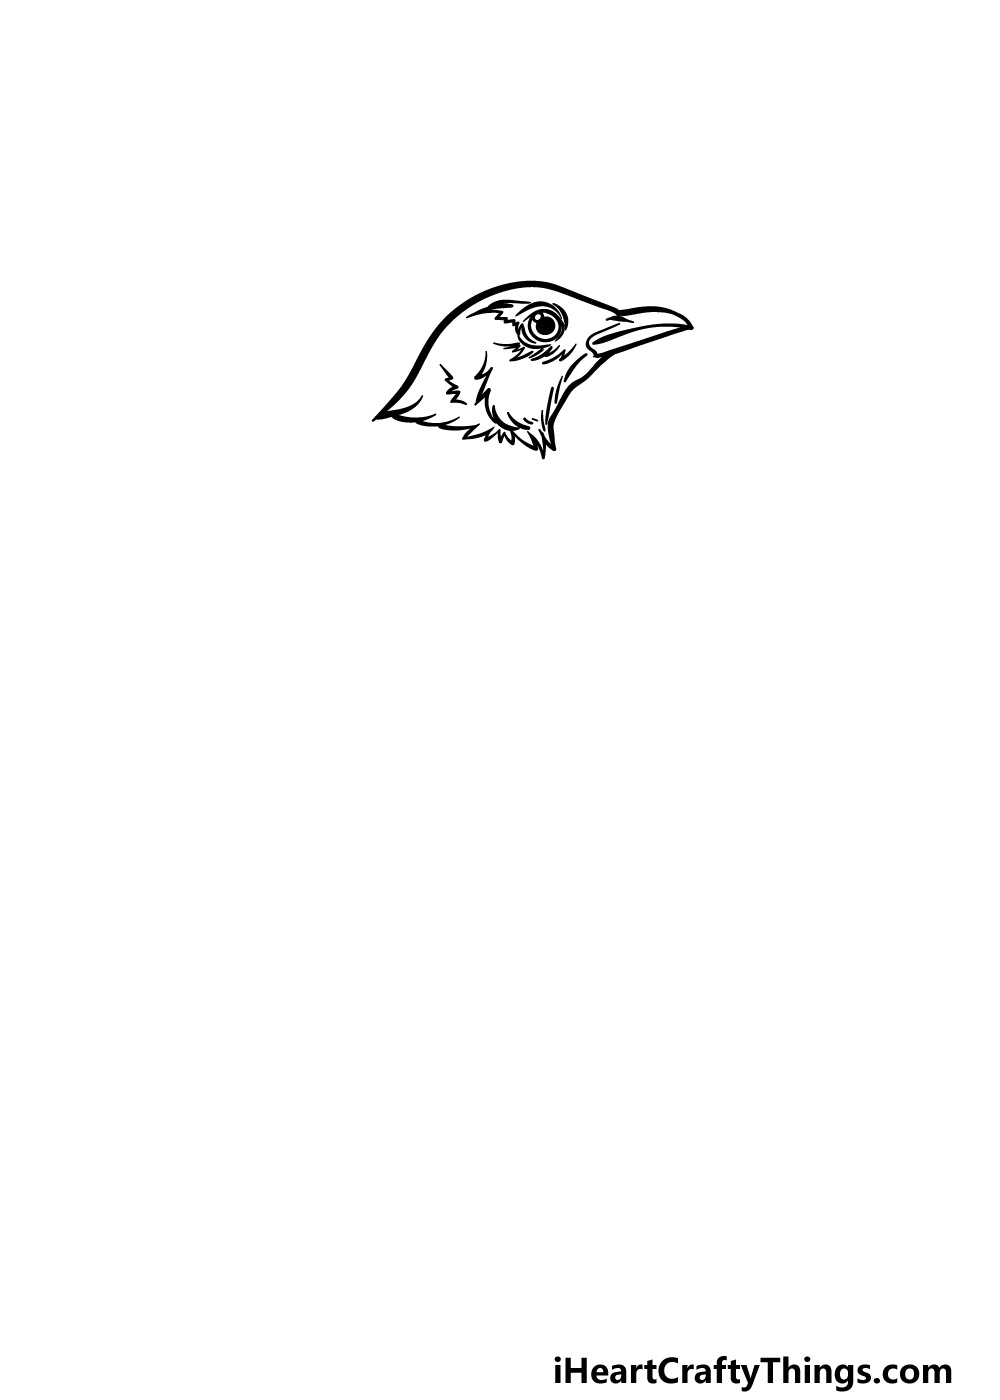
We will be taking it from the top in this first step of our guide on how to draw a robin. That means that we will begin by drawing the head of the robin.
The top of the head will be drawn with a smooth, curved line, whereas the base of the head will have more jagged, pointy lines to give it a feathery base.
Then, we will be using some round shapes for the relatively large eye outline, and then we will add a big black pupil inside of it.
Finish off by drawing the thin, pointy beak and then add some more pointy lines to the interior of the outline.
Step 2 – Now, start drawing the chest of the robin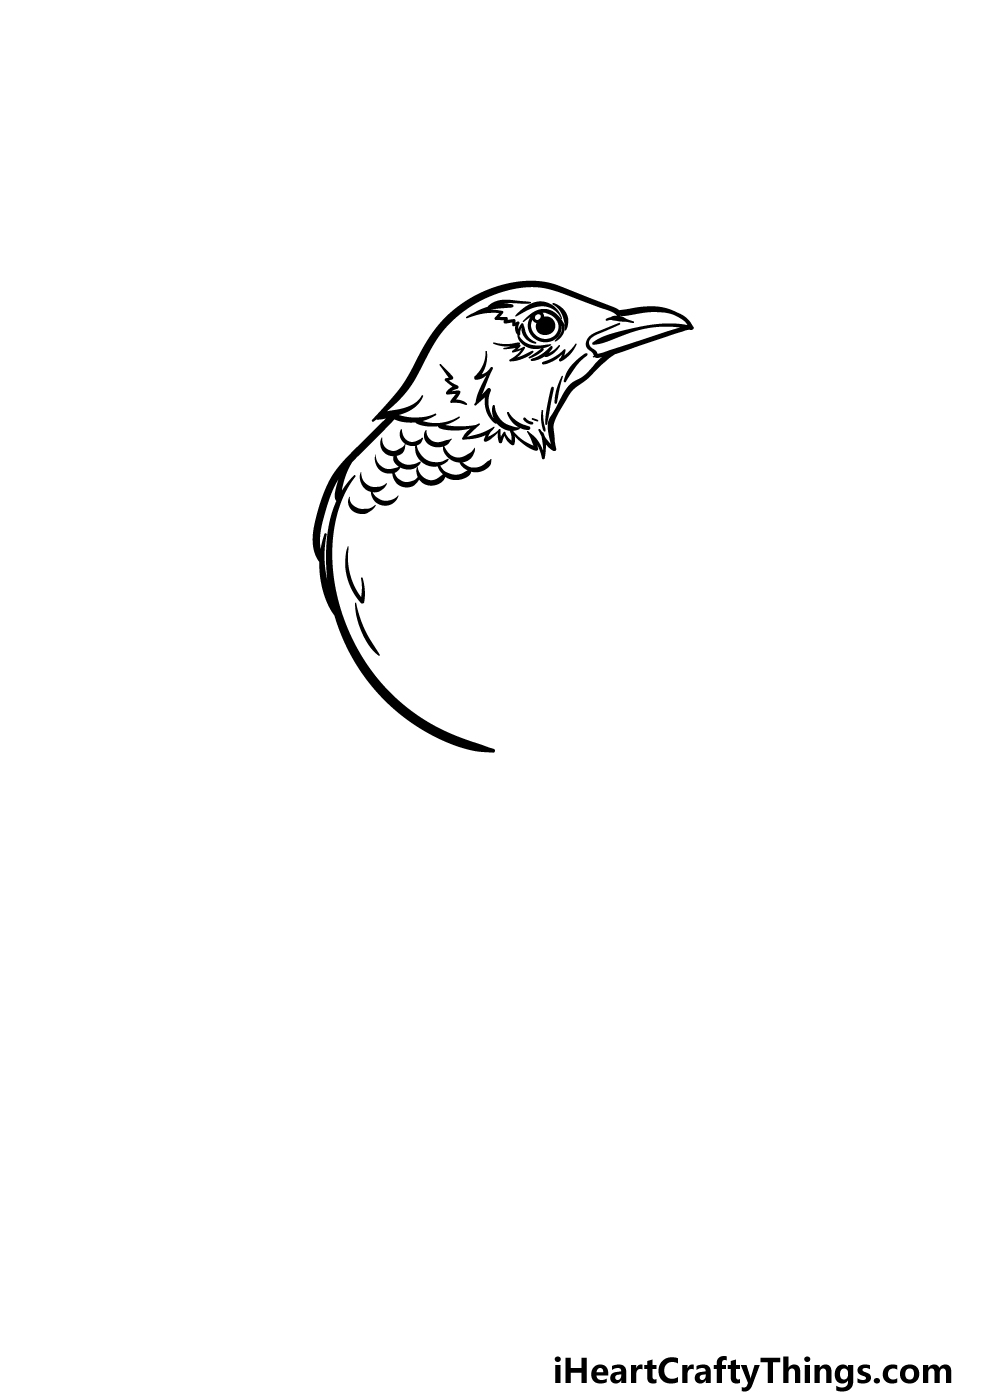
Next, we will begin drawing the chest of your robin drawing in this second step. Use a long, curved and smooth line extending down from the head to create the chest.
Once this outline is drawn, we will add some texture to the interior as well.
To do this, simply draw some small, curved lines onto the chest to create this texture. Then you will be ready for step 3 of the guide!
Step 3 – Draw the first wing of the robin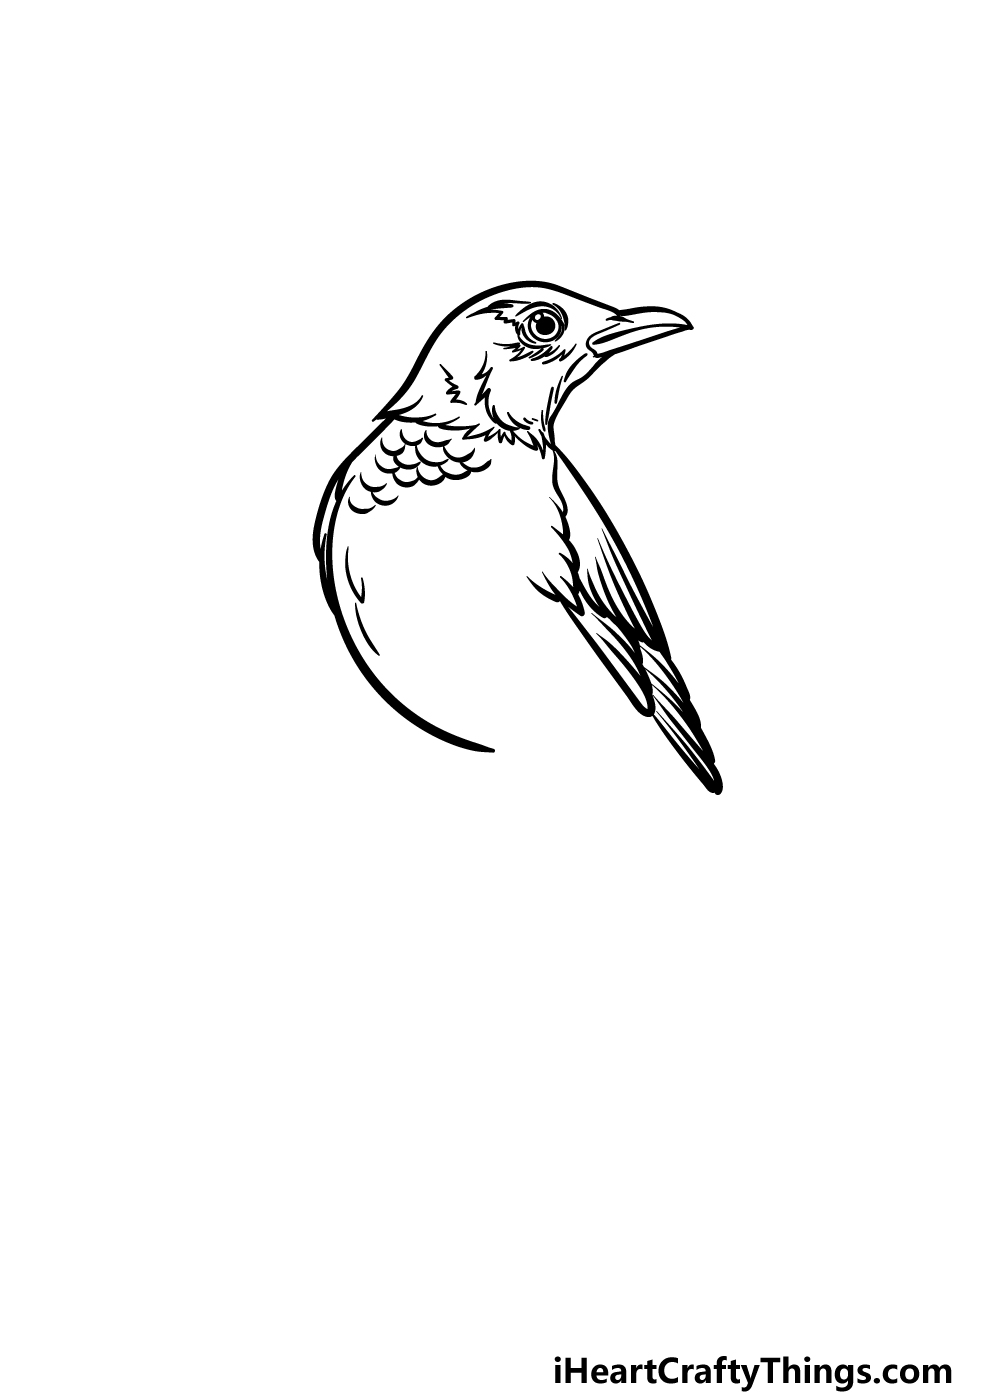
Every robin needs some wings to help it get around, and that is what we shall be adding in this third step of our guide on how to draw a robin.
The outer outline of this wing will extend down from the base of the head. Use a thick, smooth and slightly curved line for the outer edge of the wing, as shown in the reference image.
The inner details of the wing will be drawn using several sections connecting to one another, and the reference image will show you how these sections should look.
The inner portion of the wing will be drawn with a bumpy line to also give it some feather texture. Once you're happy with how the wing looks, we will then be ready to proceed on to step 4.
Step 4 – Next, draw some feather details for the base of the body
Continuing on with your robin drawing, we will now be adding some texture details to the base of the body near the tail.
These details will look similar to the details that you added to the chest of the robin in a previous step.
That means that you will be drawing lots of small, rounded lines there to give it some feathery texture.
Step 5 – Now, add the legs and the branch it is perched on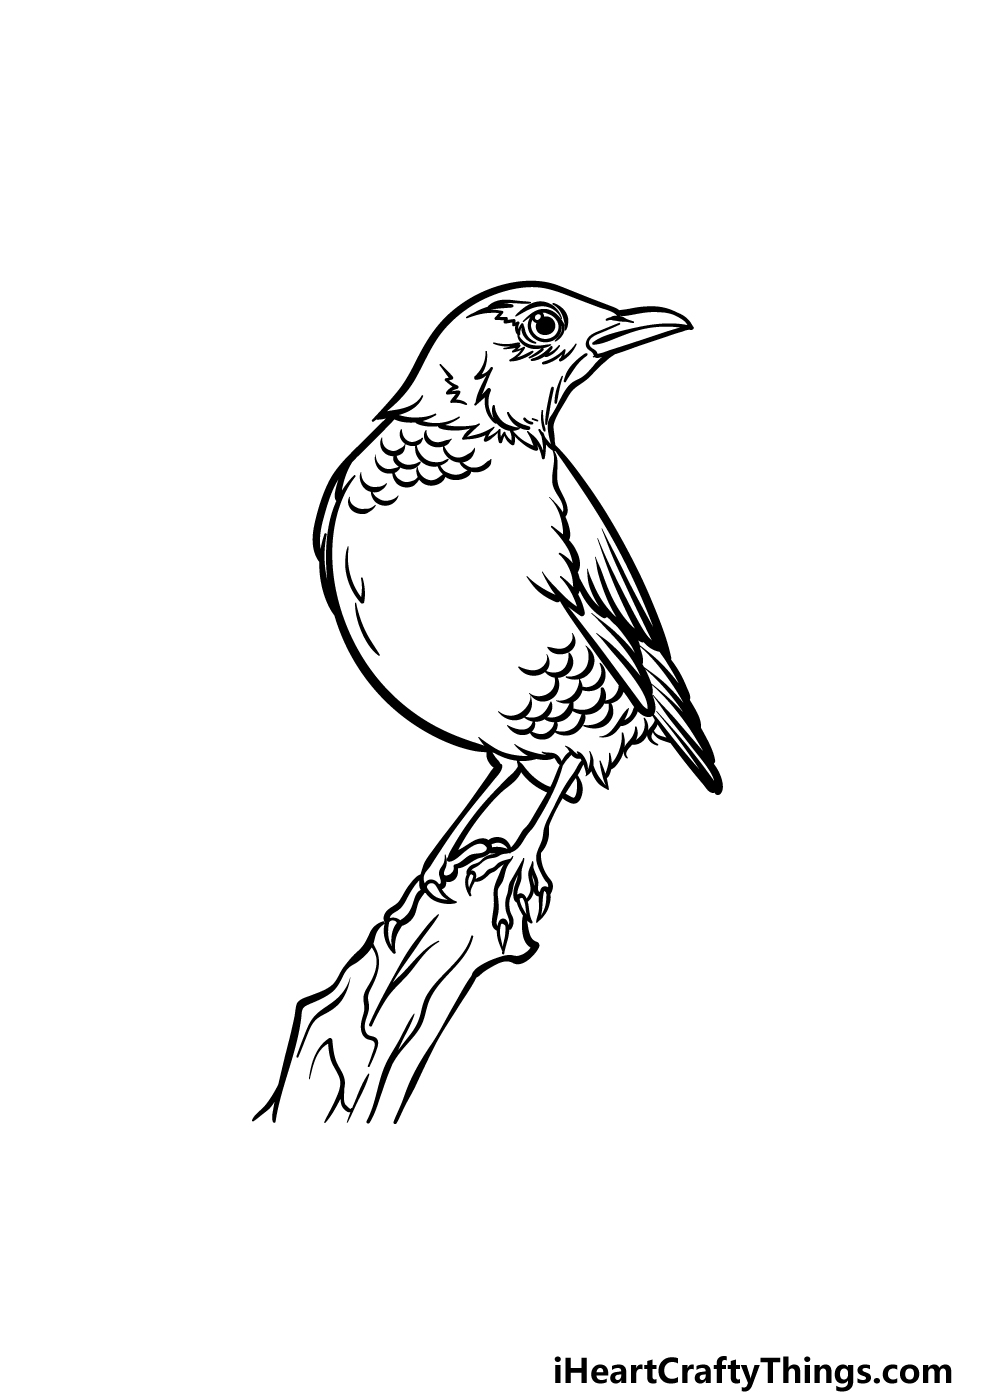
For the fifth step of this guide on how to draw a robin, we will be adding some legs and the branch that it is sitting on.
The legs will be very thin and dainty, and they will be drawn with some more smooth, solid lines. The toes will be fairly long, and there will be some sharp nails at the ends.
Finish off by using some slightly curved lines with some wavy line details within for the thick branch it is sitting on.
Step 6 – Add the final details to your robin drawing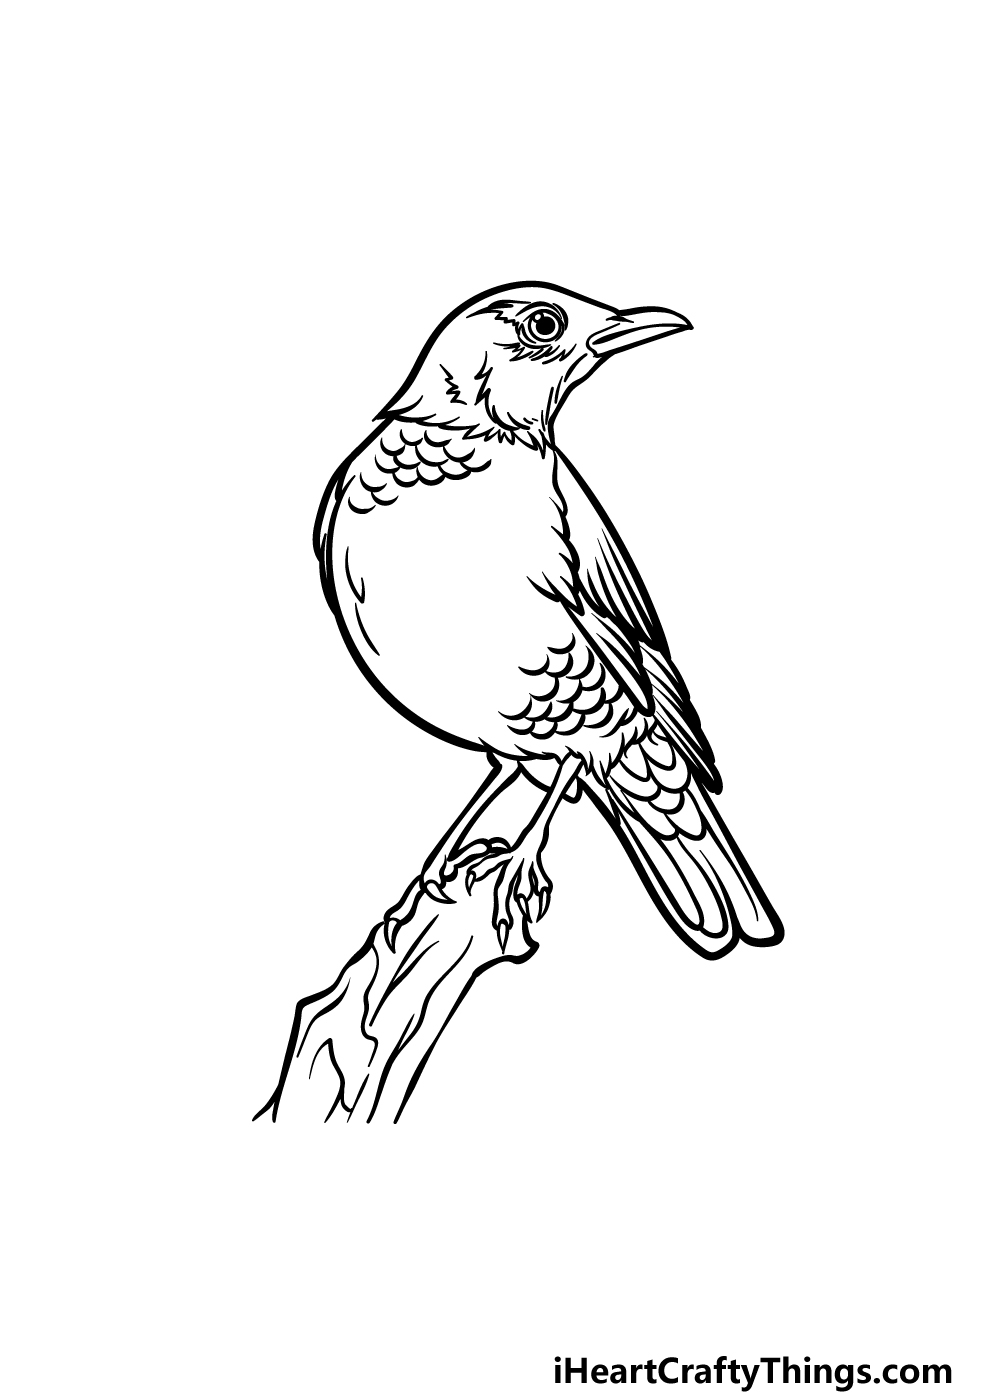
Now it's time to add some final details and elements to your robin drawing to have you ready for the final step.
Start this by drawing some small, curved lines to the base of the tail for some softer feathers. Then, we will be using some bigger curved lines for the longer feathers at the end.
You'll then be ready for the final step of the guide! Before you proceed to that, be sure to also draw any additional background details or other ideas that you may like for it.
What ideas do you have to finish off this robin drawing in style?
Step 7 – Finish off your robin drawing with color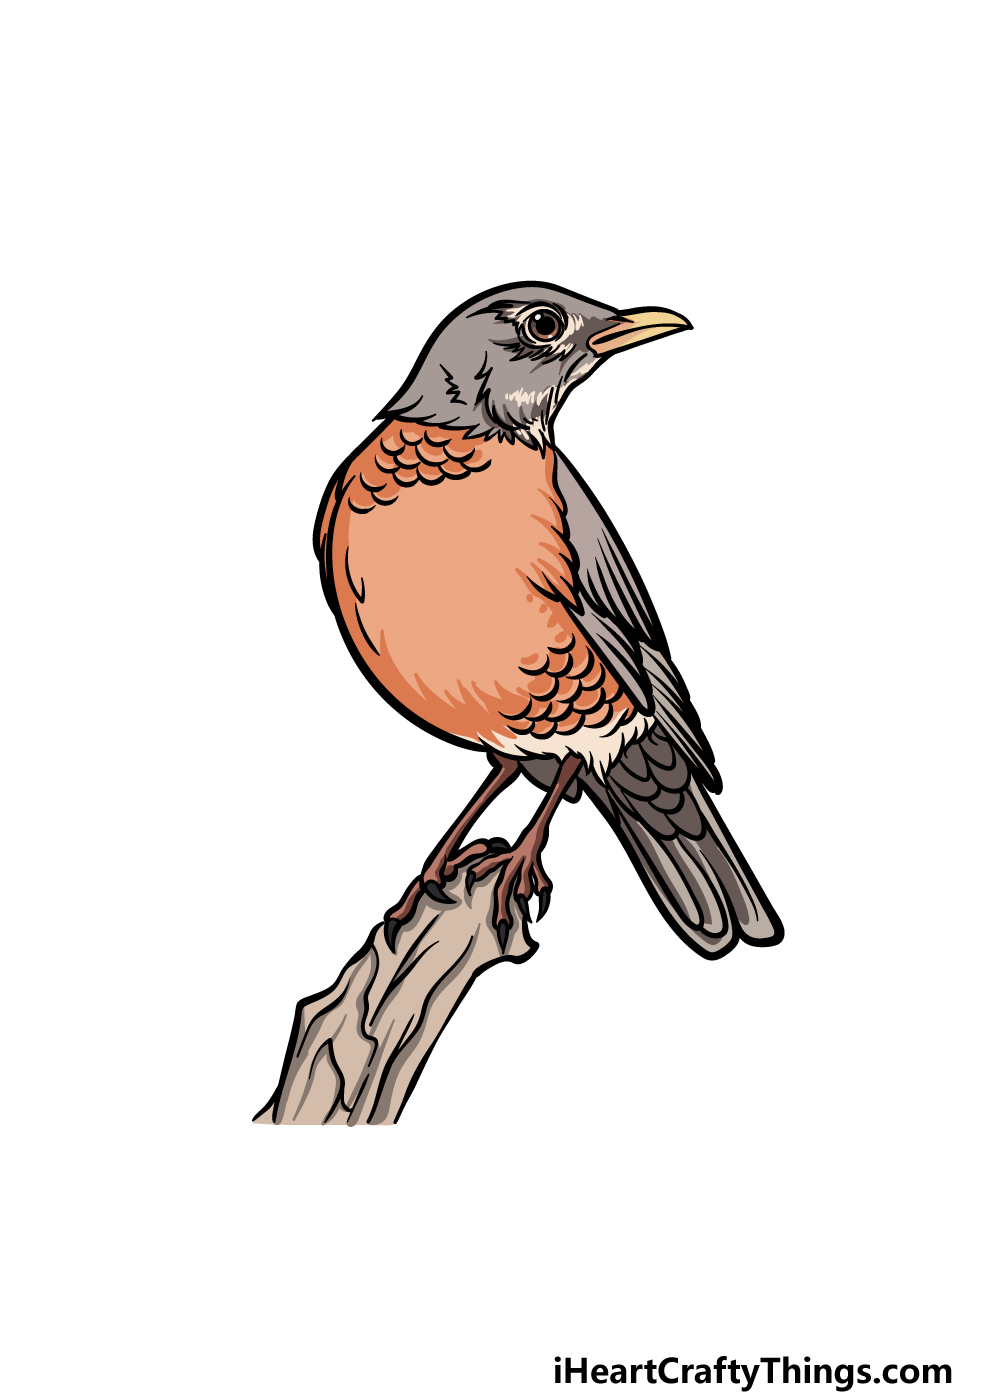
This is the final step of this guide on how to draw a robin, and in it we shall finish it off by coloring your creation in.
The robin has a lovely muted color scheme to it, and this is what we went for in our example image.
That means that we went for some more muted browns for many of the feathers, and then we used a light orange color for the chest and underside along with the beak.
Will you use a similar color scheme for your own image? We think that watercolor paints would look amazing for this image, but any art mediums you use will look great.
It will be interesting to see what you choose for your image!
Your Robin Drawing is Complete!
That takes care of all 7 steps of this guide on how to draw a robin, and we hope that it was tons of fun to work through!
There are loads of small, delicate details to get right with this picture, and in this guide we aimed to show you that by following the steps it doesn't have to be that hard to do.
You can also show off your own creativity by using some extra additions, background details, colors and art mediums to really make the picture your own!
Then, you can head on to our website for more amazing drawing guides to enjoy. We upload new ones often, so checking in often is the best way to never miss out!
We would love to see how your amazing robin drawing came out, and the best way to show us is by sharing it on our Facebook and Pinterest pages.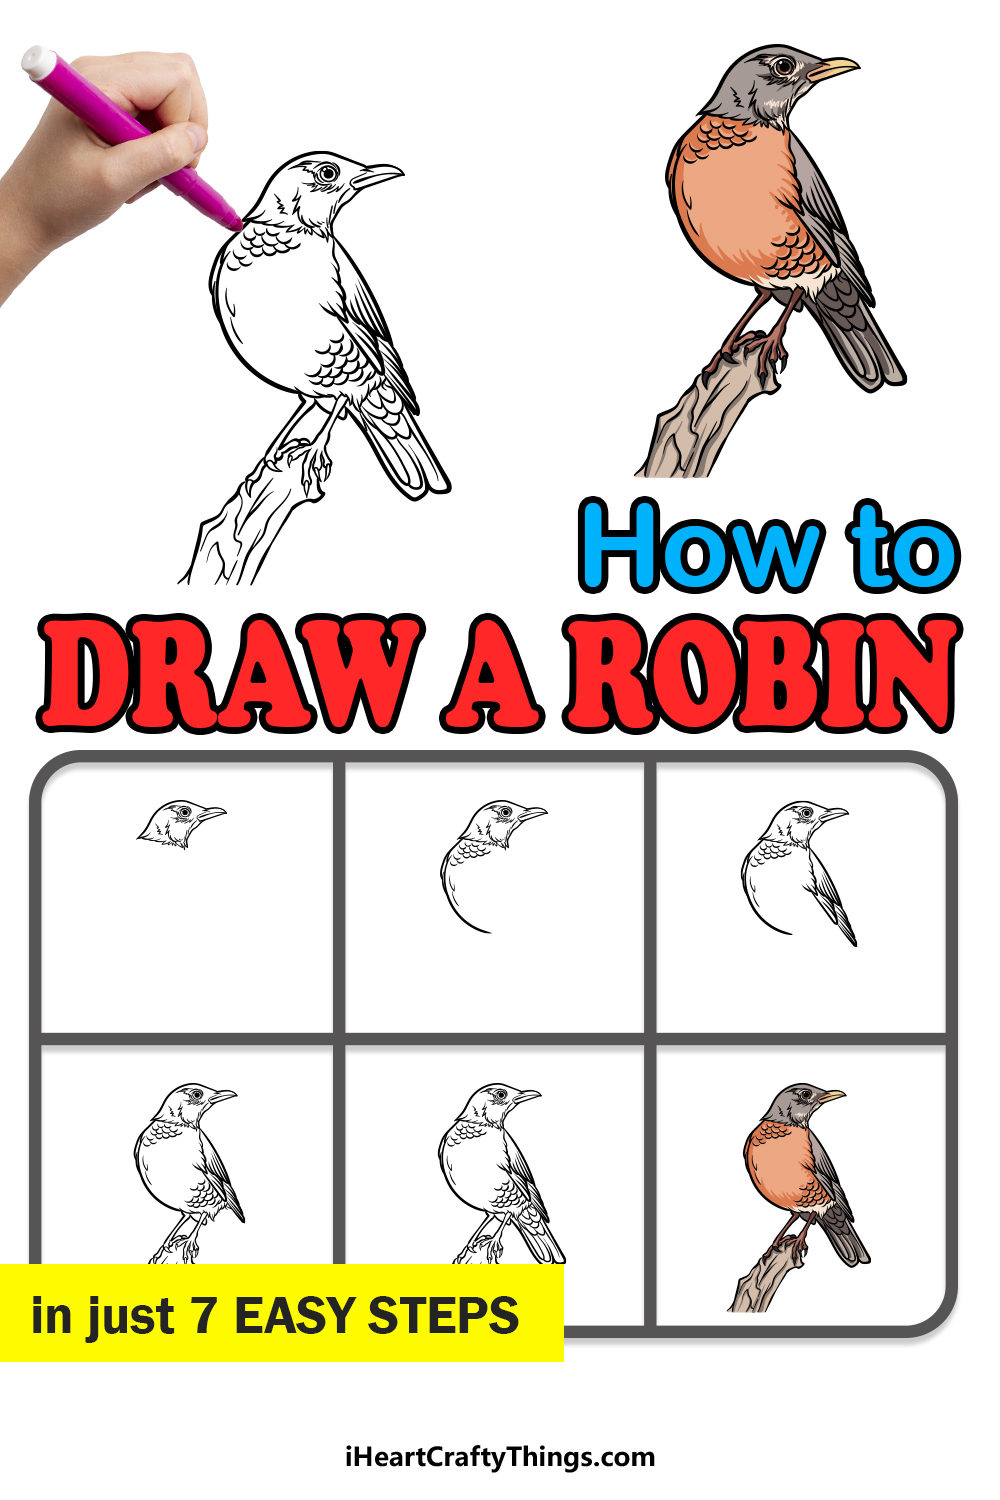
How to Draw Robin Step by Step Easy
Source: https://iheartcraftythings.com/robin-drawing-2.html
0 Response to "How to Draw Robin Step by Step Easy"
Post a Comment